PicPioneer User Guide
Key features
Here’s a quick review of key features that are helpful for users to get started with PicPioneer:
- Background Customization: Choose any background colors and images.
-
Pillow Effect: Add a subtle 3-D effect to your product images with adjustable strength.
Strength Options: High, Medium, Low. - Shape Transformation: Change the shape of your product images with options for Circle, Rectangle, and Square, all intelligently handled by AI.
- Custom Selection for Batch Editing: Streamline your workflow with batch selection and editing of multiple images simultaneously.
- Restore Original Image: Maintain flexibility with option to revert to the original image when necessary.
Background Color
-
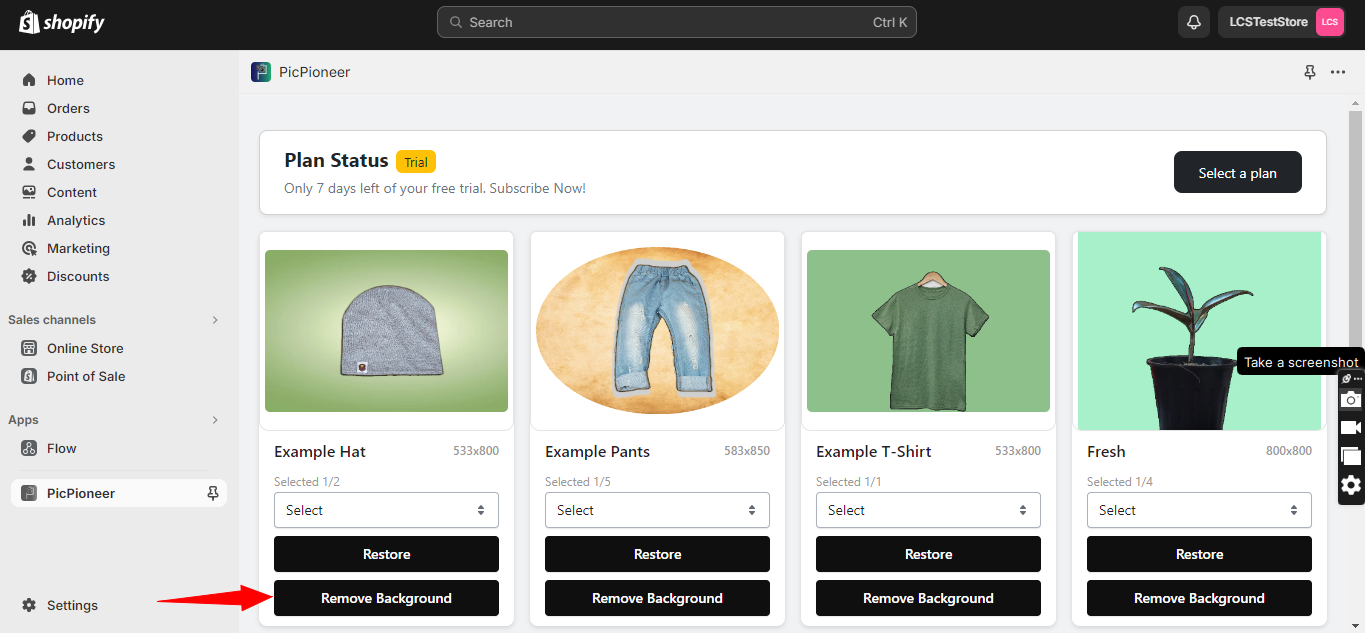
In the app, click on "Remove Background" below the image for which you want to remove the background.
-
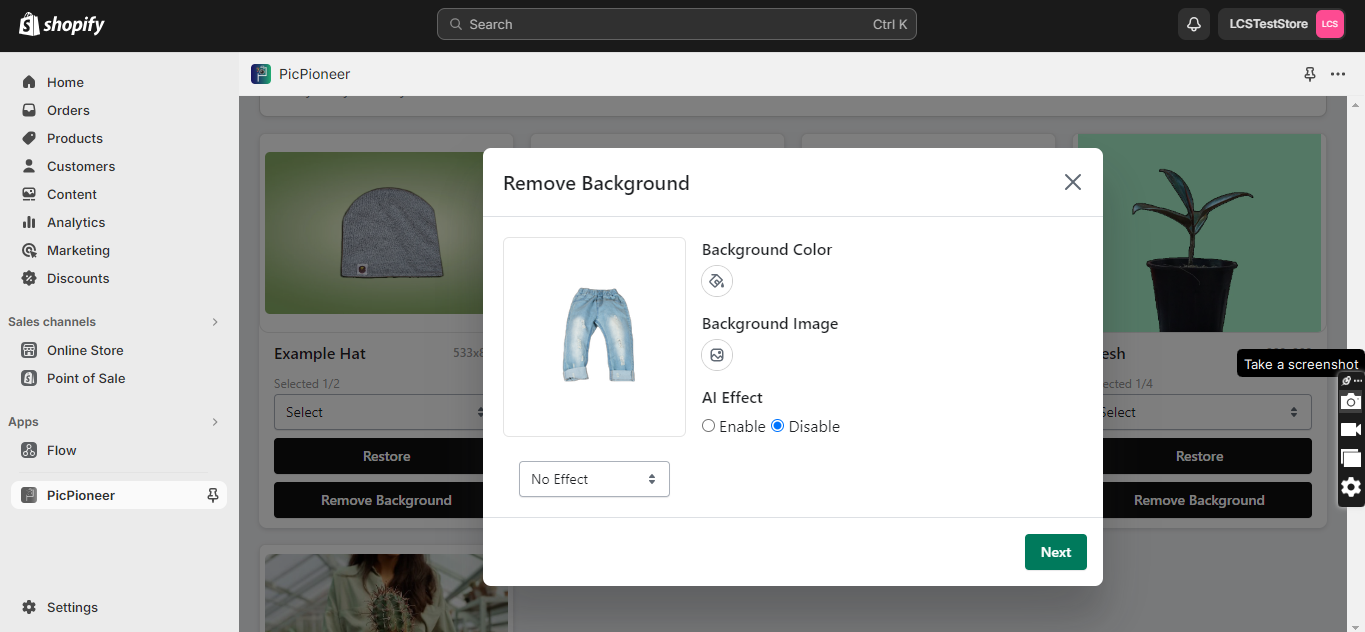
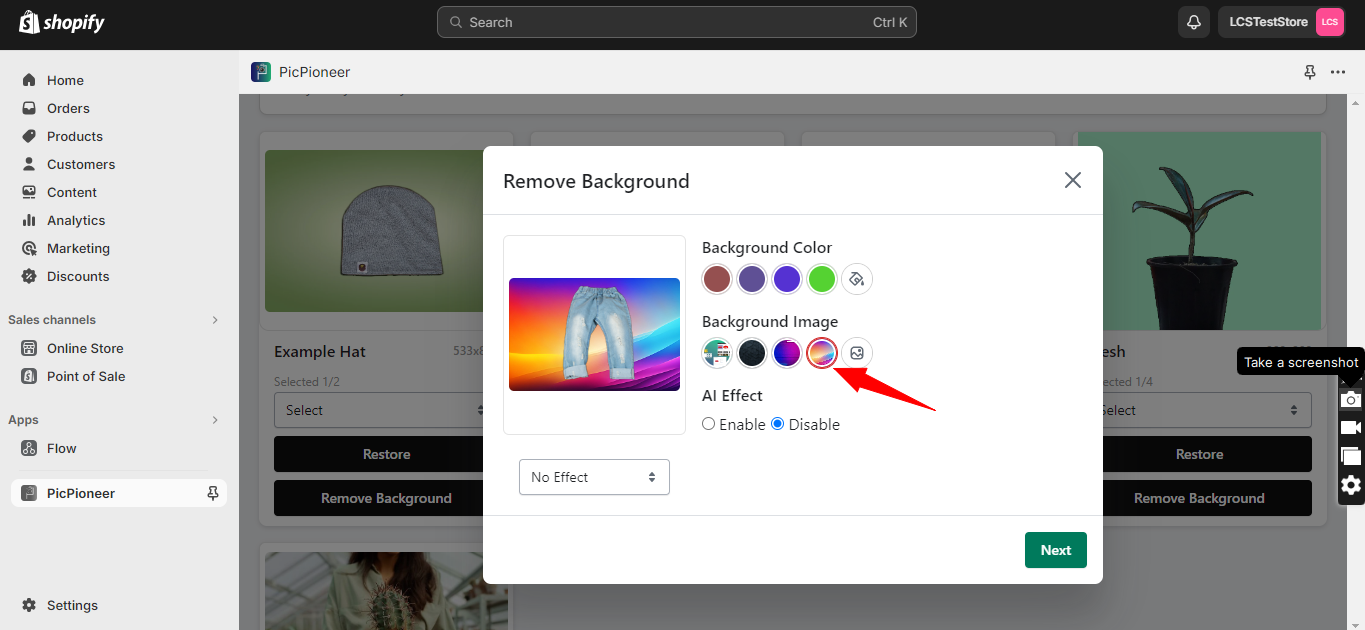
After removing the background, a pop-up screen will appear as shown below:
-
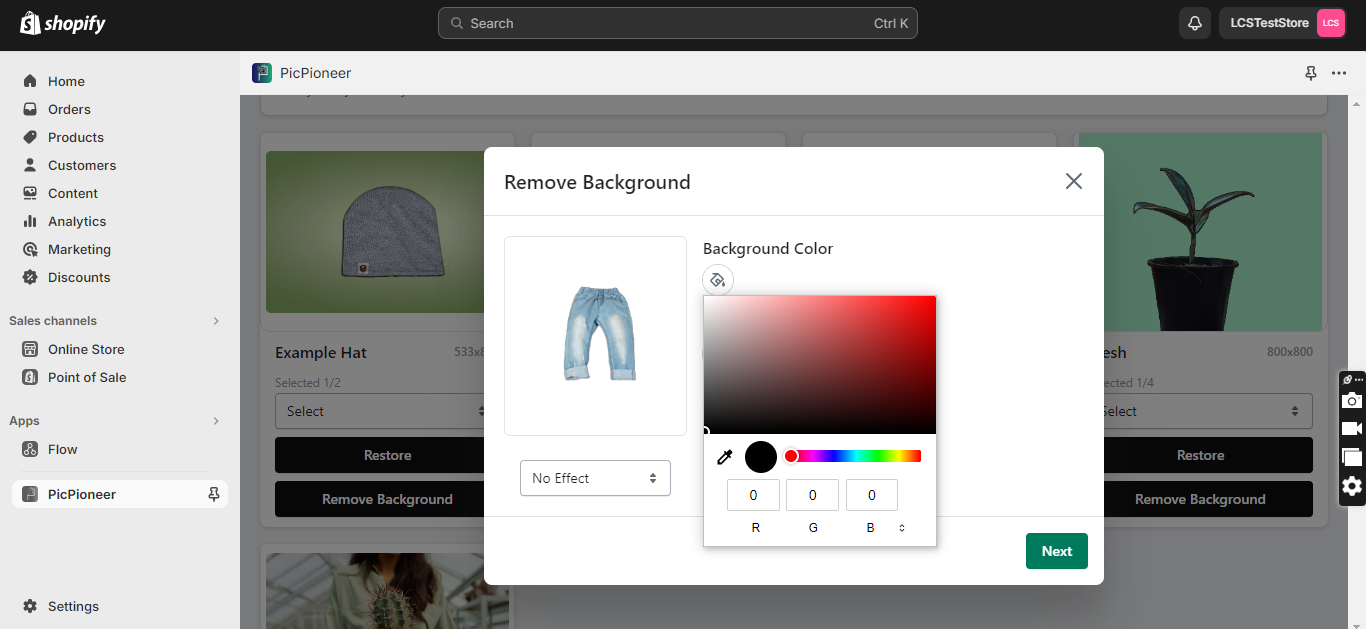
Now click on the "+" icon available just below the Background Color. After clicking on "+ ," a color picker will appear where you can select any background color.
-
After selecting the color, it will show as a color swatch. Select the color, and it will get applied to the background.
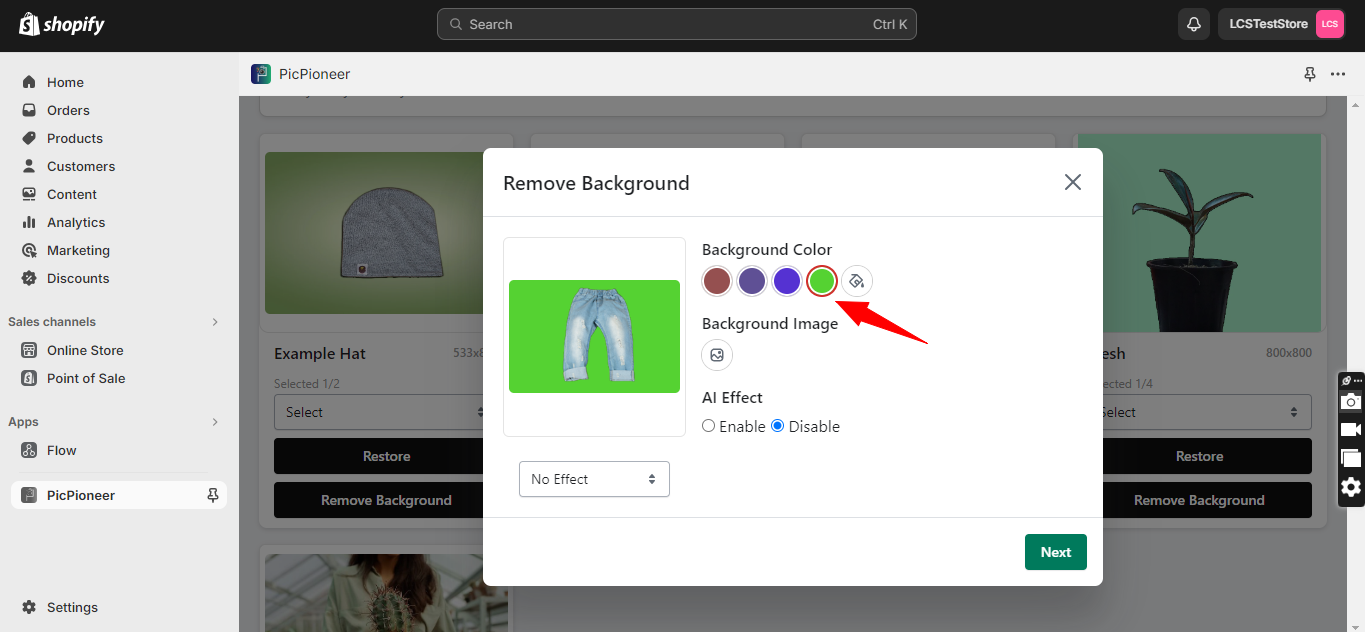
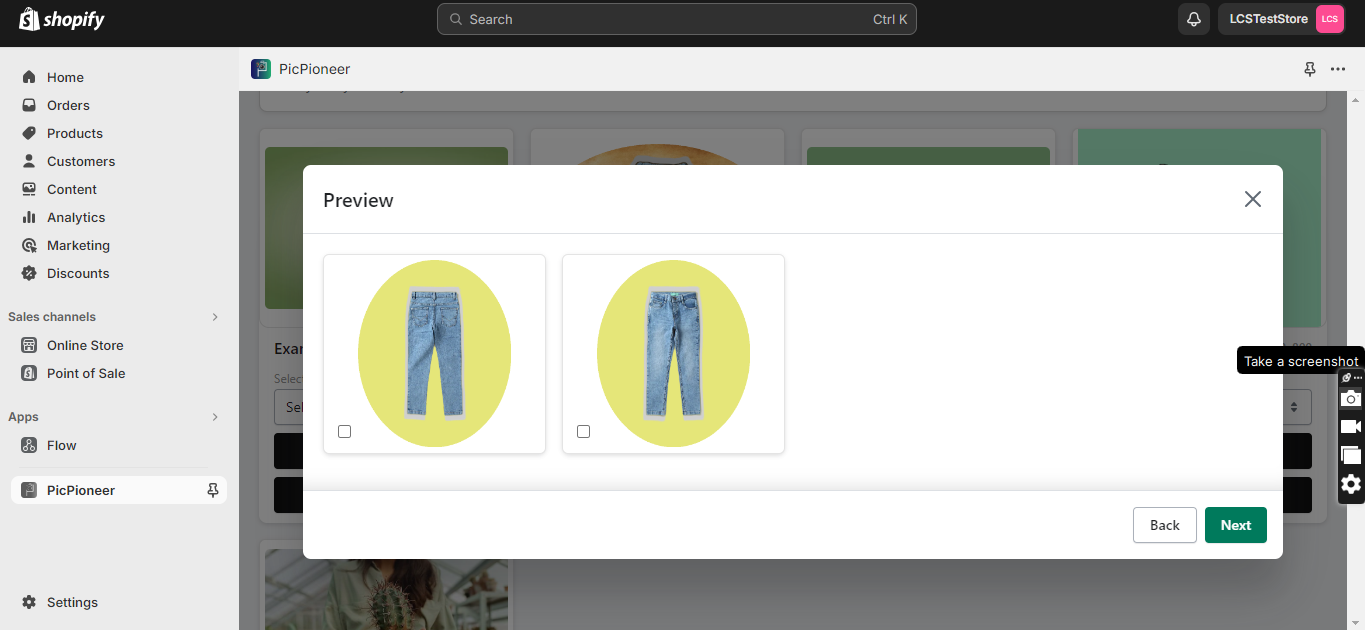
- After the background color is applied, click on “next” to see a preview of the image before updating it.
Background Image
-
In the app, click on "Remove Background" below the image for which you want to remove the background.
-
After removing the background, a pop-up screen will appear as shown below:
-
Now click on the "+" icon available just below the Background Image. After clicking on "+ ," you can select any image from your gallery
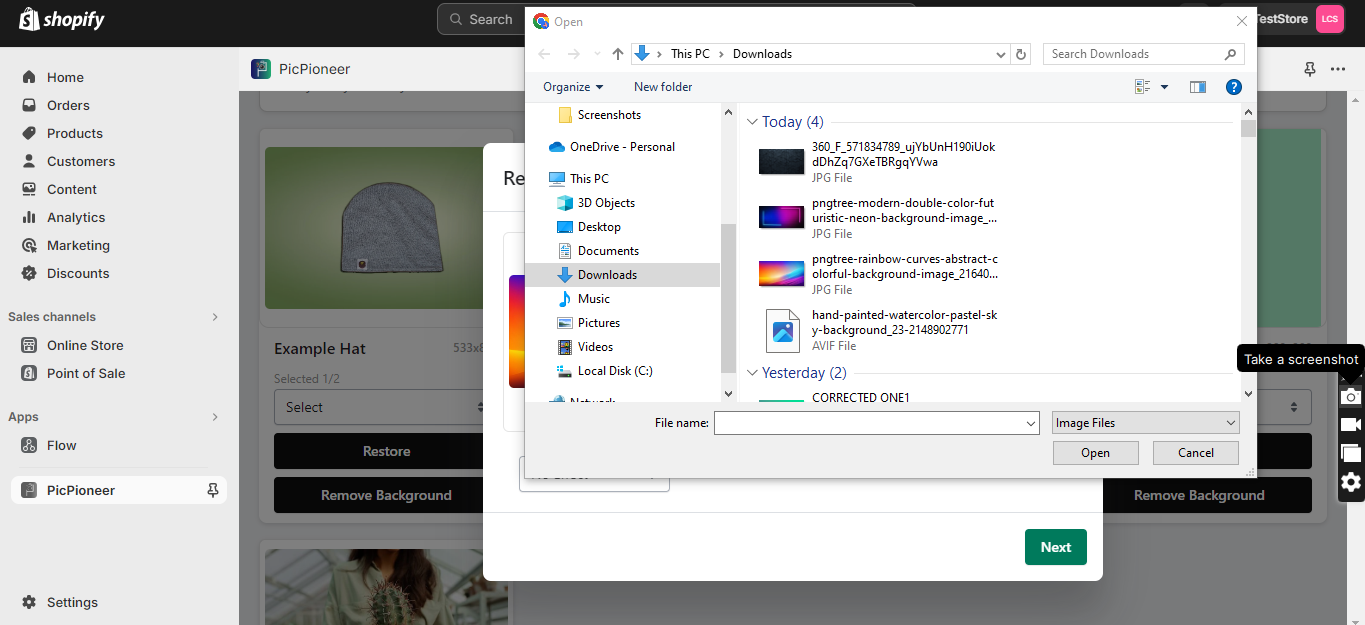
-
After selecting the image, it will show as a swatch. Select the image swatch, and it will get applied to the background.
- After the background image is applied, click on “next” to see a preview of the image before updating it.
Custom Select
-
Click on “Select” and then a drop-down will appear as shown below:
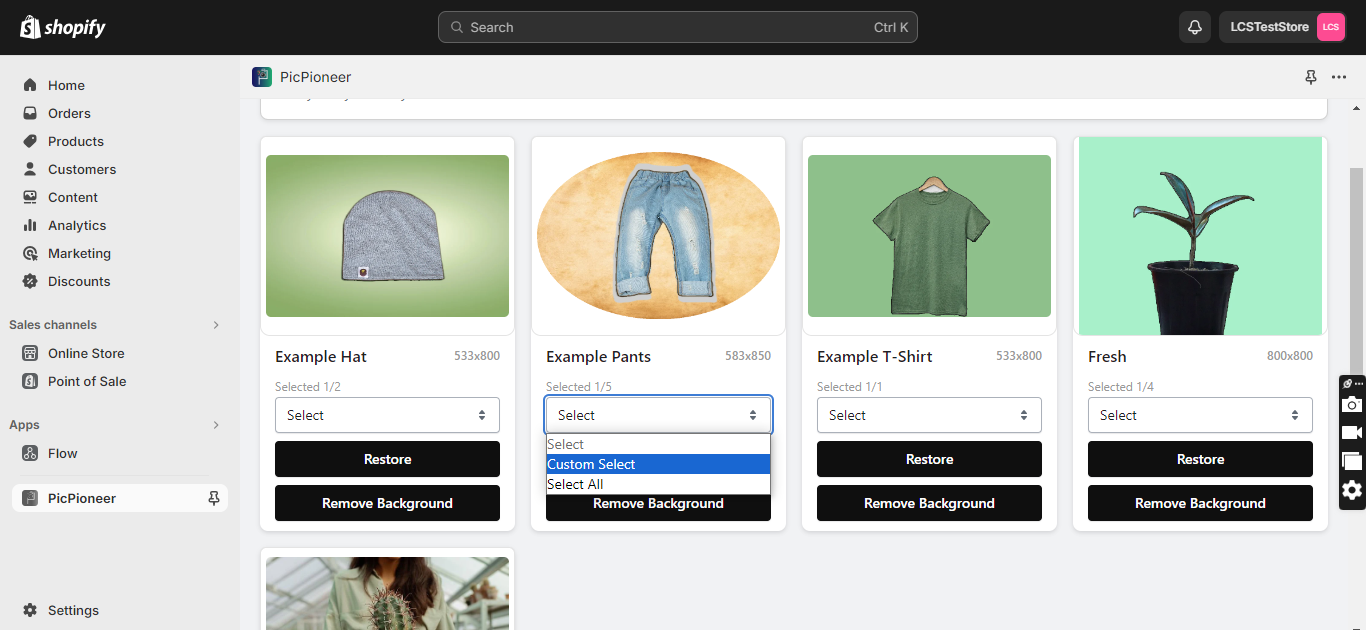
-
Select “Custom Select” from the drop down. It will give a pop up screen a shown below:
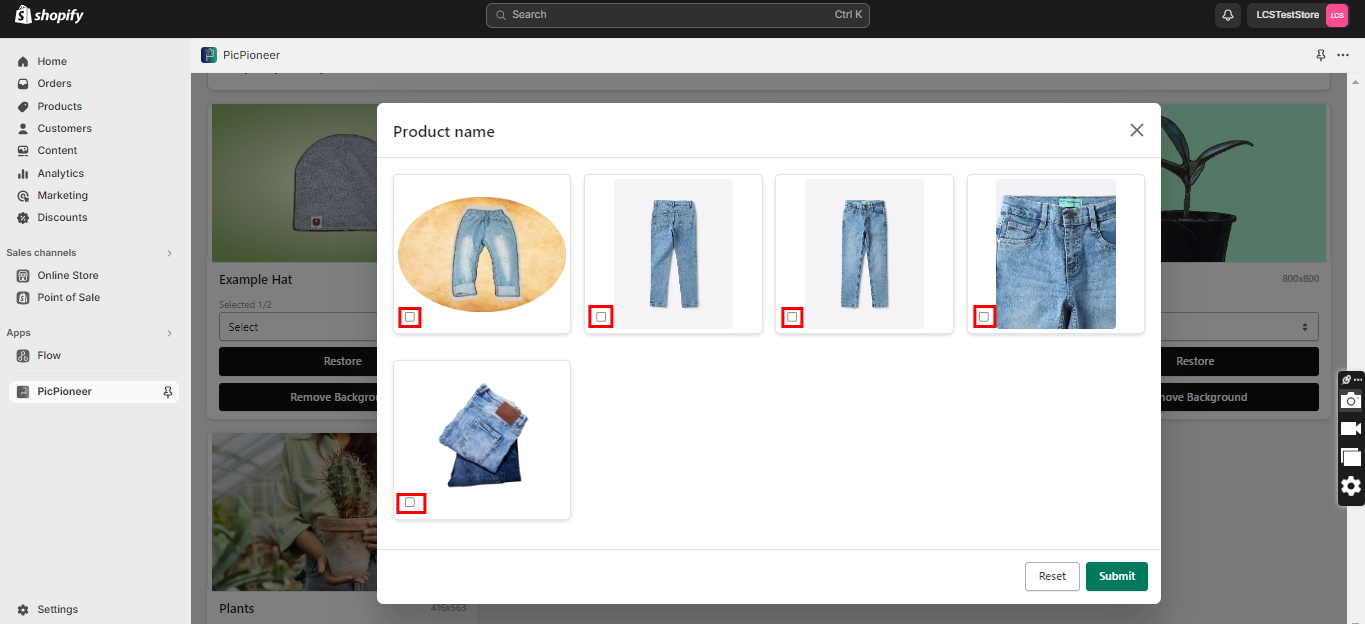
-
Select the products which you want to edit together using the checkbox given at the bottom left corner of each image. After that, click on “submit”.
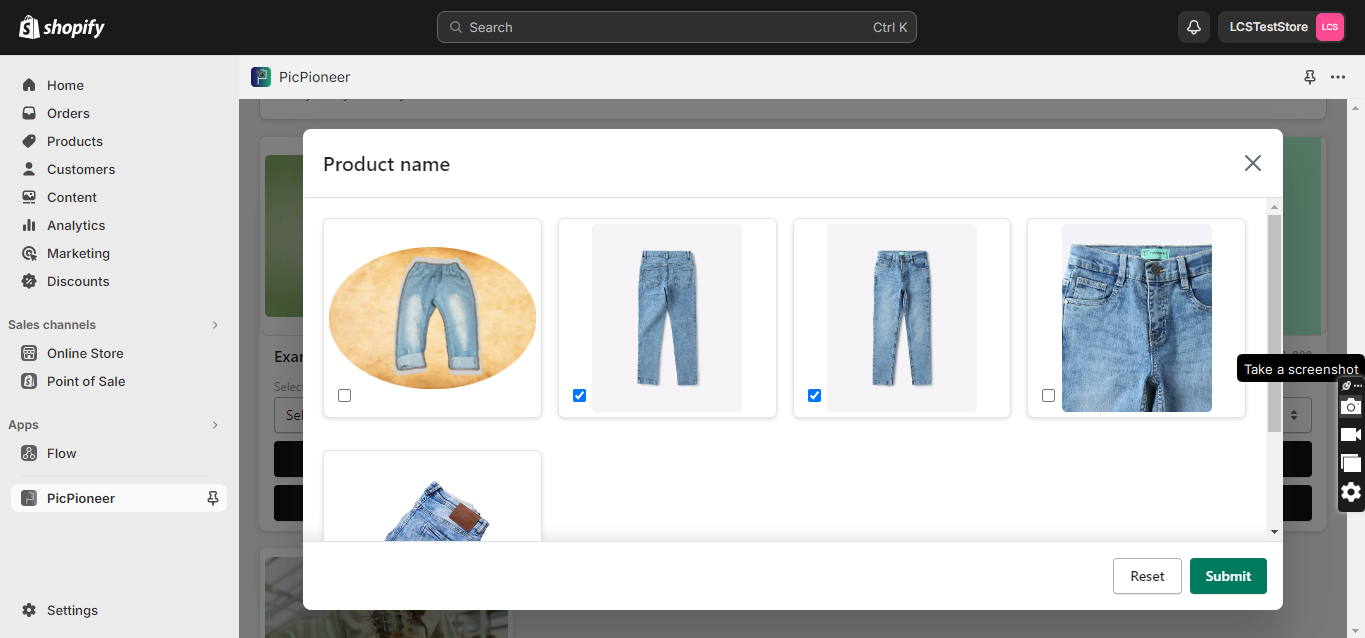
-
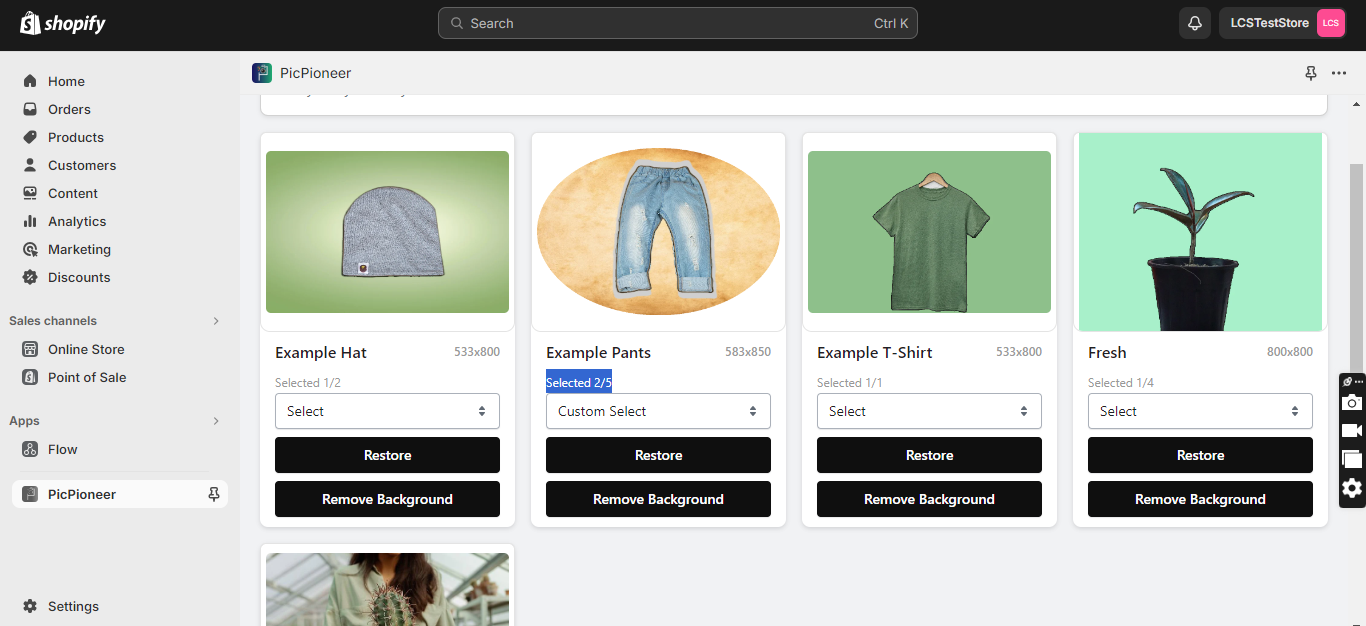
Now, the image is selected. Any editing or restoration will be done on all images selected using custom select.
AI Effect
-
In the app, click on "Remove Background" below the image for which you want to remove the background.
-
After removing the background, a pop-up screen will appear as shown below:
- Now click on the "+" icon available just below the Background Color/Image. After clicking on "+," apply any background color or background image.
-
Once background is applied,click on “enable” below AI Effect and then select the intensity(high, medium or low) by clicking on drop down.
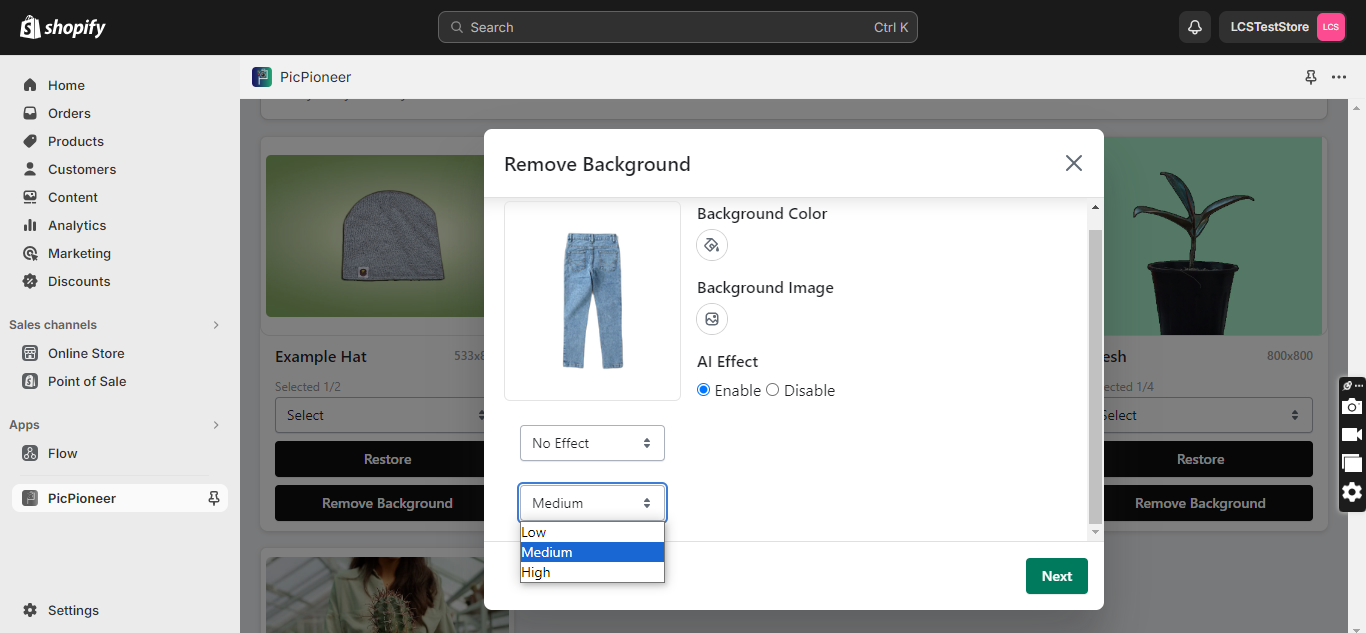
- Once done, click on “next” to see the preview of the image.
Shape
-
In the app, click on "Remove Background" below the image for which you want to remove the background.
-
After removing the background, a pop-up screen will appear as shown below:
- Now click on the "+," icon available just below the Background Color/Image. After clicking on "+," apply any background color or background image.
-
Once the background is applied,click on “no effect” below the image and select the shape to be applied on the image from the drop-down.
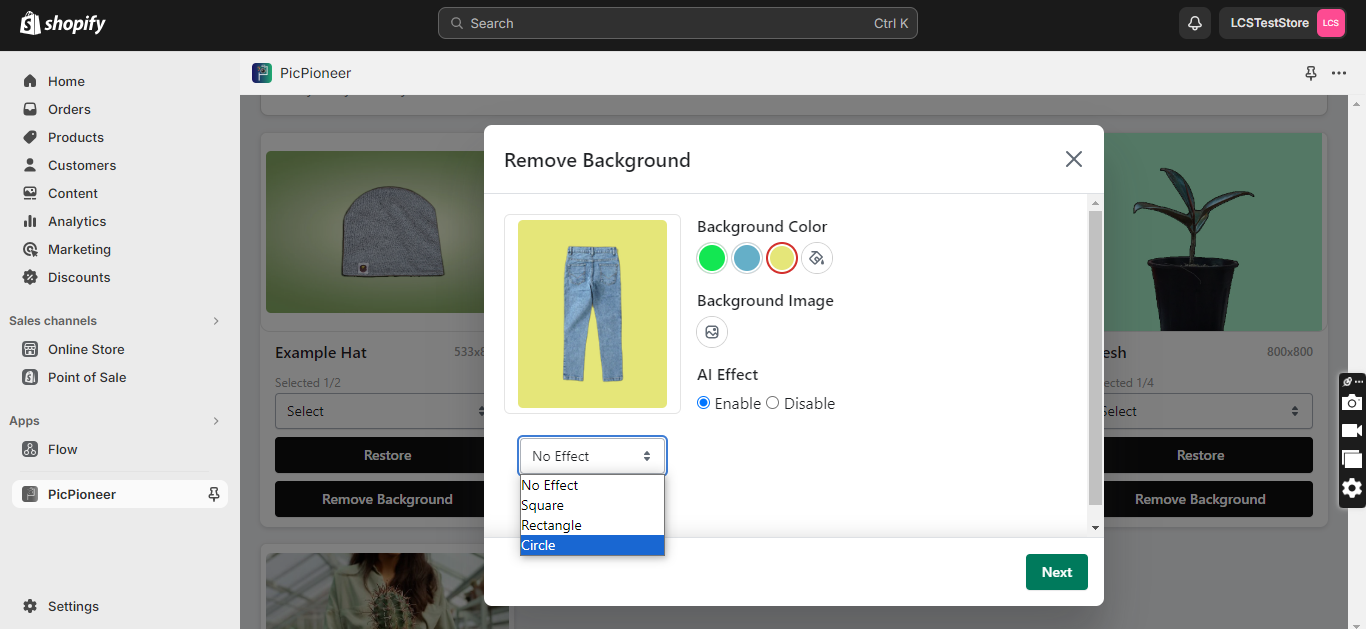
- Once done, click on “next” to see the preview of the image.
Restore
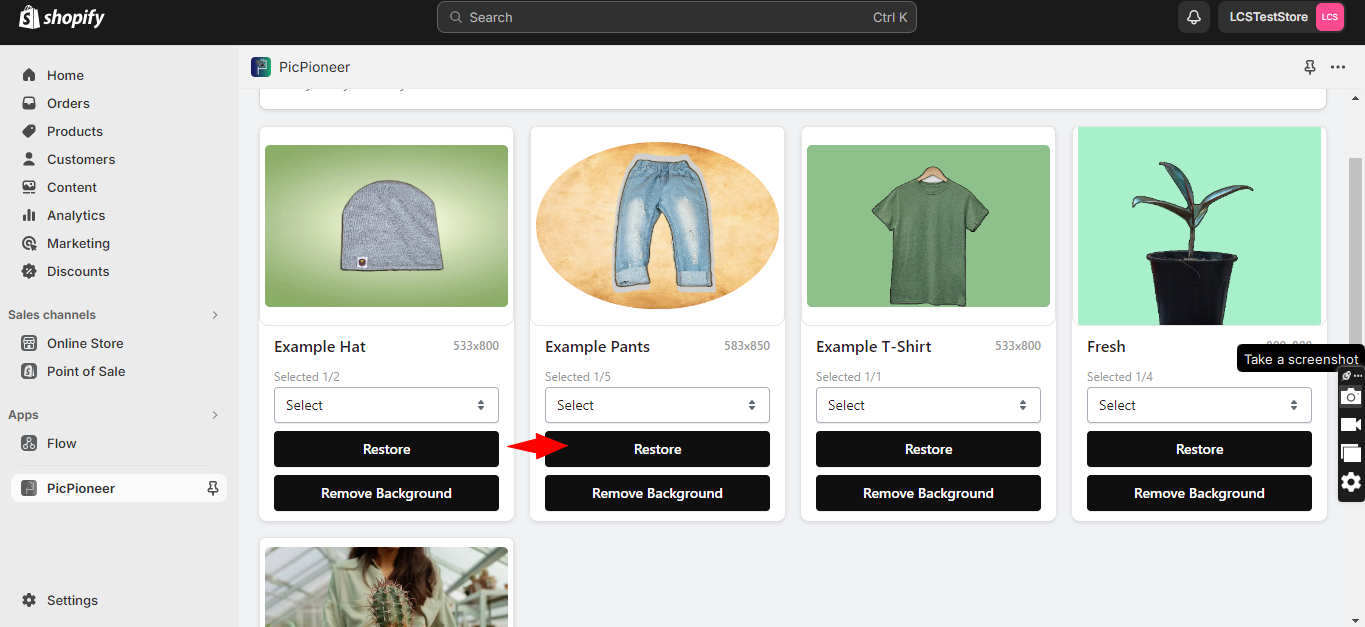
-
Click on the “Restore” button to restore the original image:
-
It will show a pop up screen as shown below. Select the image to be updated using checkbox and then click on “update”
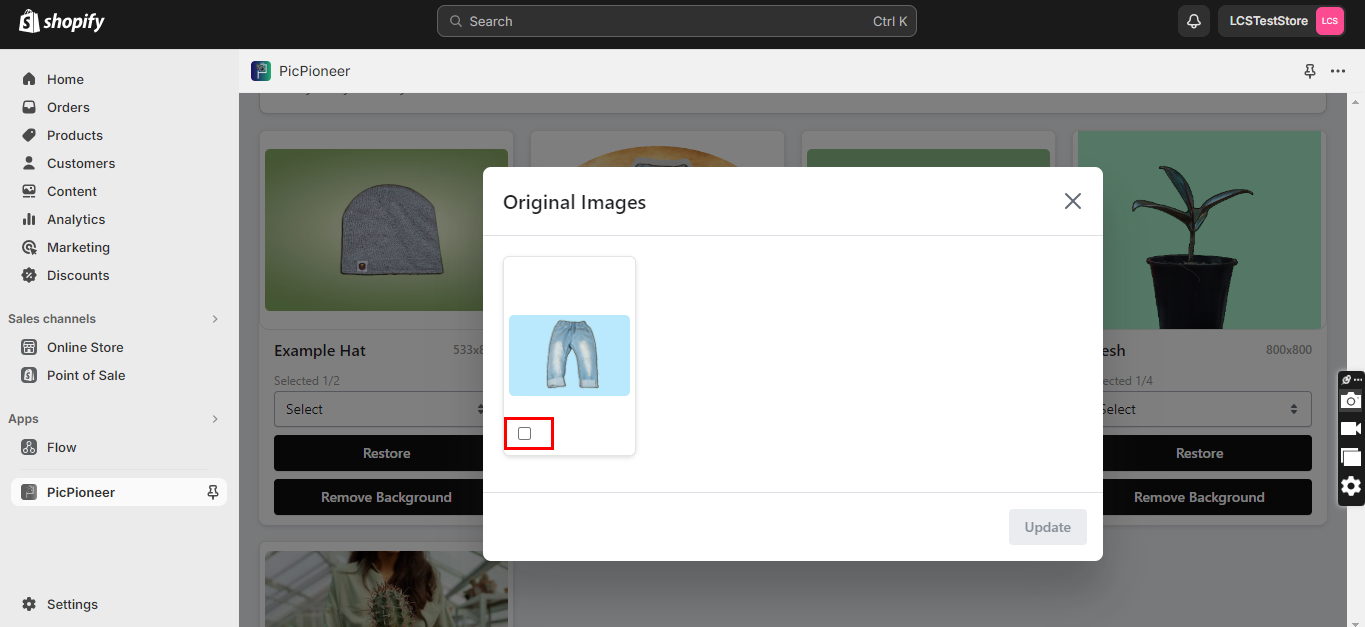
- The original image is now restored.
Important note:
The Restore functionality is designed to retrieve the initial, unedited version of an image. It does not retrieve any intermediate or secondary versions of the image, created during the editing process.
Set up
Set up PicPioneer in your Shopify store
You can install the app easily through the Shopify App Store by following these steps:
- Log in to the Shopify App Store.
- Find and click the app PicPioneer.
- On the app listing page, click Install app.
- In your Shopify admin, to authorize the use of the app, click Install app.
- Wait until the app finishes running processes. The process involves fetching your Shopify store's images, and syncing it with PicPioneer. The app needs to fetch and sync the data for further implementation of the app’s features.
- After this you are ready to start your journey with PicPioneer.
Get support
We offer email support. When you have any technical issues or other concerns that you prefer to receive via email, you can contact us at customersupport@laitkor.com and our customer support team will be happy to help you as soon as possible.
Free trial
Start a free trial
Your free trial begins after you successfully install PicPioneer and you will not be asked to provide your payment information in order to start your free trial.
You will not be charged automatically after the free trial ends. The remaining days of your trial can be checked on the app’s homepage. If you choose to upgrade to a monthly subscription before the end of your trial, then your subscription will start after the free trial ends.
,
Note: The free trial cannot be paused.
End of the Free Trial
You won’t be charged for anything when your trial expires. There will be a charge if we see you sign up for a pricing plan after the end of your free trial.
When the app understands that you don’t upgrade to a monthly subscription after your trial ends, it will stop syncing your store’s products
All the settings you have done to your store by PicPioneer will not be removed and the app will work smoothly after you subscribe to a plan successfully.
Get the most out of your 7 days
We offer a free 7-day trial which allows you to test all features of PicPioneer. You also receive support at all levels during your free trial.
Pricing plan overview
Introducing our Monthly Subscription – an easy and flexible way for you to enjoy everything our app has to offer at just $4.98 per month. Here's what you get:
Full Access:
Use all our app features as much as you want. Get premium images, and advanced editing tools – it's all there for you.
Help When You Need It:
Our customer support team is here for you at customersupport@laitkor.com . If you have any questions or concerns, as a Monthly Subscriber, you'll get priority help for a quick solution.
Unsubscription policy: Upon unsubscribing from our app, your subscription will be terminated effective the next billing date. This means you won't incur any further charges beyond that point. We aim to make the unsubscription process clear and seamless for our users. If you have any questions or need assistance, feel free to reach out to our support team.
PicPioneer App General FAQs
Q1: Can I choose any background for my product images?
A1: Absolutely! You can choose any background color from color picker or image from your gallery , giving you full control over the visual presentation of your products.
Q2: What is the AI-Effect, and how does it work?
A2: It is an AI-driven feature that adds a subtle three-dimensional quality to your product images. You can adjust the strength of this effect with options like High, Medium, or Low, providing a nuanced depth to your visuals.
Q3: Can I change the shape of my product images?
A3: Yes, you can! PicPioneer offers options for Circle, Rectangle, and Square, all intelligently handled by AI. This allows you to break free from conventional shapes and let your products shine uniquely.
Q4: Is it possible to revert to the original image after applying edits?
A4: Certainly! The Restore featureI, provides you with the flexibility to revert to the original image whenever necessary. This allows you to experiment fearlessly while maintaining control.
Q5: I cannot see products on the app for editing?
A5: Products that are not Active or have the Sales channels and apps setting set not as “Online Store” in the Shopify configuration – the app doesn't index such products.